Get your perfect profile picture with these simple steps — even if you're just using a phone camera
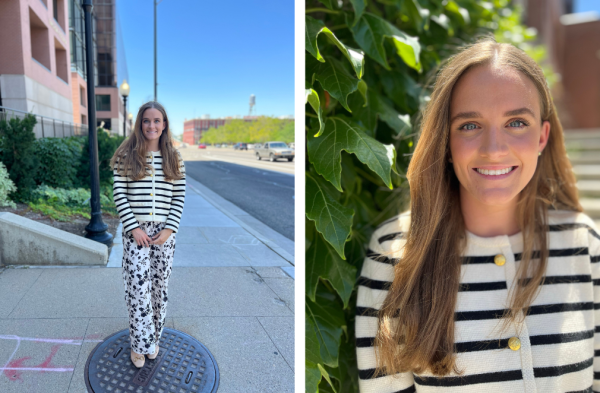
Your LinkedIn photo is an employer’s first impression of you. Having a professional photo makes your profile 14 times more likely to be viewed by others! You can make your profile picture stand out, even with just a phone camera. In fact, every picture in this article was taken using a phone.
1. Focus on the face.
A portrait should focus mostly on the face. Closer shots will be more personal and engaging for your LinkedIn profile picture.
2. Move closer to the subject.
Take a few steps closer to the subject instead of zooming in the camera. A photo taken physically closer helps you look more dimensional and balanced, whereas only zooming in can make the photo look flat and reduce the quality of your pictures. If you need to take a picture from farther away, it’s better to take the photo without zooming in and crop it afterward.
3. Follow the rule of thirds.
Imagine a nine-squared grid over your picture. Place your face where one or more of the lines meet. This position balances the frame and draws the viewer’s eye to you.

4. Find shade in bright places.
An even shadow on your face looks better than harsh, dark shadows under your eyes. Try to stay in a fully shaded space if you’re taking pictures in bright sunlight, and make sure the background is shaded as well.
5. Be aware of the foreground and background.
The foreground is what is in front you in a picture. The background is what is behind you. Putting a natural object, like a plant, between you and the camera can create depth and interest in your image. Avoid busy backgrounds with lots of detail or movement.

6. Include leading lines.
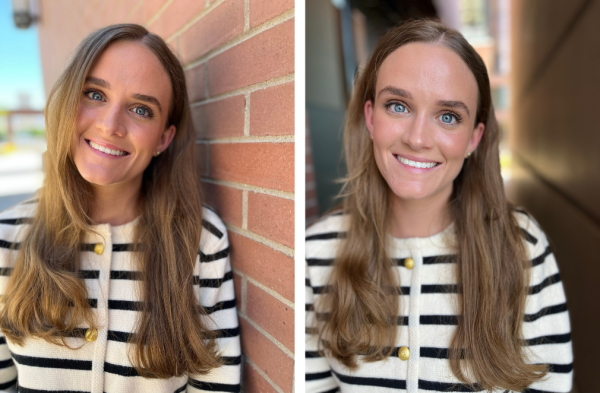
Leading lines are lines in the environment that pull the viewer’s eye toward a specific part of the photo. By using natural lines, like the brick and the narrow walls of the alley in the photos below, viewers are drawn to your face.

7. Use designs and architecture to your advantage.
You can use parts of your environment, such as walls and fences, to make interesting backgrounds. When you want to include a dynamic background, take the photo at an angle. This will show a hint of the design or architecture without being too distracting.

8. Understand your body language.
Take multiple pictures with your arms and body in different natural positions. While there is no exact right or wrong way about how to pose your body, your body language can express different emotions. Folding your arms might come off as insecure or aggressive, whereas leaving your arms at your sides or putting your hands on your hips can help you seem more open or confident.